Saturday, May 22, 2010

Turkey Burger Recipe!

Remember when I showed you all the turkey burgers I made a while back?  Well, after checking some files at Travelers (where I work during breaks) I found the recipe!  I can’t for the life of me remember where it was from, but here you go:

---------------
What you'll need:
  • 1 1/4 lb. lean ground turkey 
  • 1 tbs. olive oil
  • 1 tbs. onion powder
  • 1/4 tsp. garlic powder
  • 1/2 tsp. oregano
  • 1 tbs. freshly chopped parsley
  • 1/2 tsp. salt
---------------
How to make it:

Mix everything together in a large bowl until combined; don’t be afraid to use your hands!  Makes about 6 patties – and they freeze great!

---------------
Happy summer and happy grilling!

Monday, May 17, 2010

Special Sandwich Part 2: It's Eatin' Time

If you read my post yesterday about the sun-dried tomato spread I made, you know that this is part 2 of a two-part, fabulous Panera-inspired panini.  I call it my Cheddar Chicken Panini, and it's time to get down to business.

Let's not waste any more time then, shall we?

---------------
What you'll need:
  • The sun-dried tomato paste we made yesterday
  • Fresh bread
  • Tomato
  • Cheddar cheese (I used shredded because that's all that I had!)
  • Chicken
  • Salt and pepper
  • Olive oil 
---------------
Let's make the sandwich:

Start off with your chicken.  I had chicken tenders, which worked well, but if you have chicken breasts, just cut them in half so that they are thinner.


Sprinkle with salt and pepper on both sides.


Use a grill pan (or an actual grill, or a frying pan) that is sprayed well with cooking spray.  Cook the chicken about halfway...


...and then flip it to cook the rest of the way.  I loooove the grill marks!


Now, take a blurry picture of the chicken when it's done.  Remove it to a plate and let it cool a little.


Grab a tomato that you've resisted eating all week just for this.


And slice it up into some semi-thick slices.


Now, it's assembly time.  I only had this tiny bread, so I decided to make two sandwiches.  Lay a piece of chicken on one side (or half, if your bread is small)


Spread a generous amount of sun-dried tomato paste on the other side.  I mean it when I say generous; I definitely wished that I wanted more when I ate it.


Next, add the tomato.  Then, add the cheddar cheese because I'm crazy and forgot to take a picture.


Put the two sides together and drizzle a little olive oil over the top.


In a heated pan (medium-low heat), spray some cooking spray and place the sandwich oil-side down.  That way, you can drizzle a little over the other side, too.


If you want to be cool like me, put a small pot cover over the top to squish the sandwiches a little.  Cook until...


...they look like this.  Then slip, cover, and wait for the other side to get brown too.


These Cheddar Chicken Paninis are grilled to perfection.  Just the right amount of brown, and super melty inside, as demonstrated by the following picture.


Look at the melty center of this sandwich!  This is when you know it's just right.  I'm dying to eat it right now.


You can even serve it with a side of tomato, like me.  But I'm a weirdo.

---------------
This sandwich totally exceeded my expectations.  The bite of the cheddar combined with the sun-dried tomato flavor went so well together.  It was melty and gooey, but the bread balanced out the soft texture of the inside.  I loved it!

If you've joined me in my recipes this week, you probably have some left over ingredients!  Well, don't worry... we'll fix that soon...

Sunday, May 16, 2010

Special Sandwich Part 1: Sun-dried Tomato Spread

As I told you all when I made my broccoli cheddar soup a couple of months ago, I worked at Panera Bread all through high school and during my first two years of college.  I love Panera, and I love Panera food, and unfortunately, being an undergrad means that 1) There are no Panera's near me and 2) I can't go out buying it all the time, anyways!  So, sometimes I like to make my versions of my Panera favorites.

I always loved the Smokehouse Turkey panini when I was at work, but after I looked at the nutrition facts for the sandwich, I steered clear of it!  It had tons of calories and fat, so I could only indulge every once in awhile.  It was a turkey panini with cheddar cheese, bacon, tomato, and a sun-dried tomato spread on Asiago foccacia (the best bread ever!).

My version of this panini is a little different; this version was out of "inspiration" rather than a direct copy.  For example, I thought grilled chicken would go nicely, and I didn't have any turkey, so I used that instead!  I call this the Cheddar Chicken Panini - and here is part one of it.  I had to make my own sun-dried tomato spread, which was a long recipe in and of itself.  So... here's the recipe for the sun-dried tomato spread!

---------------
What you'll need:
Counterclockwise from left: Garlic powder, tomato paste, crushed garlic, sun-dried tomatoes (in oil), salt, olive oil, sugar

---------------
How to make it:

First, measure out 3/4 of a cup of sun-dried tomatoes.  It doesn't have to be perfect.  And don't throw away the oil that the sun-dried tomatoes were packed in!


And dump them into the blender.  I decided to put in the tomatoes first because I wanted them to get chopped up well.


Now, measure just under 1/4 of a cup of olive oil.  Why don't we measure the full amount now, you ask?


Because we add in some of the olive oil that the tomatoes were in!  Fill it up to the 1/4 cup line and add it into the blender.


Now, we want 1 teaspoon of crushed garlic into the blender as well.  I used my garlic press, so it was really easy!  You'll probably need around 3 cloves.


Spices next!  Add 1 teaspoon garlic powder...


...1 teaspoon sugar...


...and 1/2 teaspoon salt.


Chop up some fresh basil and add it in, too.  If it's not very fine, that's okay - it will get chopped up more in the blender.  2 tablespoons will do.


And if you're a dummy like me, chop a little extra for the second tablespoon.


Finally, the main component of the spread: 2 6-oz. cans of tomato paste.


This looks ready to blend!


Blend it well and it should look like this!  It took me a little while to get through the big chunks of tomato, but this felt about right.


Since there is so much, it's perfectly acceptable to freeze half for another time.  Trust me - this will last you forever and it will be plenty for your sandwich that we'll make... tomorrow!

---------------
Come back tomorrow for the full Cheddar Chicken Panini!

Saturday, May 15, 2010

Breakfast at Pete's

On this lovely Saturday, I'd like to bring you what I wish I was doing... or should we say, eating.  I know that most Fordham students have frequented Pete's Cafe at one point or another during their time here, but I actually never went until this semester (and I'm a junior!).  I was totally missing out.  Pete's brings you delicious, delicious diner fare, and in my opinion, their breakfast is the star of the menu.

Pete's Cafe opened in 1984, and it is beloved to the Belmont and Fordham community.  Its owner, Pete Nikolopoulos, passed away in February, and the whole community remembers him for his contributions to the vitality of the area life... and his wonderful food!  You'll find a Greek-American spin on many of the items on Pete's Cafe's menu, and apparently students get a 10% discount!

I should also mention here that I never used to like breakfast food until I ate breakfast at Pete's.  I HATE eggs (still do) but for some reason, the omelettes are just so good that you have to love them!  I dream about Pete's sometimes... and no, I'm not exaggerating.

So, you want to see what our breakfast was like?  Come along on a photo journey!

---------------

Andrea got some yummy eggs, bacon, and home-fries, along with toast on the side.  She wanted her eggs just like she makes them at home - runny on the inside, fried on the outside.  According to her, they were exactly to her specifications!


Because Heather is silly and doesn't like breakfast, she got lunch food - a Bacon Cheeseburger.  It was a humongo plate, and she took a lot home.  Her report?  Yum yum yum!


And I got what I had been dreaming about for days: a broccoli and cheese omelette with home-fries and toast.  I can't even tell you how good (and filling!) it was.


Look at that bite of omelette there!  It has a ton of broccoli in it (sometimes I get mushroom, instead!) and a full layer of cheddar cheese in the middle.  Needless to say by the picture, I love ketchup on my omelette too.  It goes way beyond your average omelette, and I need to learn how to make them for myself because I can't wait all summer to have one!

---------------
I know I don't have to tell most of you twice (or even once!) but grab a bite at Pete's sometime soon.  It's located at 570 E. Fordham Road in the Bronx, and it's majorly worth it!

While I was on a sandwich kick with my Arthur Ave Grilled Cheese, I made up another one, too... tune in for part one tomorrow!

Arthur Ave Grilled Cheese

Remember once upon a time when Sarah at The Gift Wrap Blog asked me to make my version of grilled cheese?  And I didn't for, what, three-and-a-half weeks because I'm crazy busy out of my mind?  Well, let me tell you: it was worth the wait.

Let me now present to you... my Arthur Ave Grilled Cheese.  I went down Arthur (which is the Little Italy of the Bronx, if you didn't know already) and got some super fresh ingredients for this combo of mozzarella, prosciutto, and basil.  I guess it's cheating a little on actual grilled cheese because it has meat in it, but trust me... it's delicious.

---------------
What you'll need:

From left to right: Prosciutto, fresh mozzarella, fresh basil (washed), olive oil, and Italian bread (in the back)

---------------
How to make it:

Start off by getting two good slices of bread.  I wanted a wider loaf, but this is all I could find in a time crunch, so it's a mini-grilled cheese for me.


Then, get some slices of fresh mozzarella - enough for both sides.  Side note: this was the most amazing mozz that I've ever had in my life.  It was creamy and melted in your mouth and I ate a ton of it before I took this picture.

Wait, did I just say that?  Nahhh.


Drizzle a little olive oil on the outside of your bread.  Then, flip it over.


Add a leaf of basil on each side.


Do you know what this is?  This is prosciutto, which is a bit like Italian bacon (but you can eat it unfried).  If you're working with a small sandwich like me, only use half of this slice.


Layer it on one side of the sandwich (we only want a hint of prosciutto here... the star is the mozzarella).


Then goes a slice of cheese on each side!


If you're using a panini press like me, open-face it on the grill.  And when I say panini press, I mean George Foreman grill.  I'm not that fancy.


Just hold the top right above the cheese...


...until the cheese is a little melty.  You can't really tell here... sorry.


Then, put one side on the other and grill it for real.


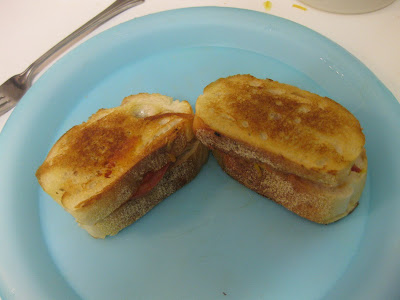
And when it looks like this, it's done.


Oh boy, am I in trouble.  Look at those layers!

---------------
Okay, listen, guys.  I really don't want to toot my own horn here, but this was a freaking amazing sandwich.  I couldn't have imagined it any better!  

The mozzarella is creamy and melts in the sandwich, and the prosciutto gives a hint of smokiness.  The second time I made it, I ripped the basil into smaller pieces so that it was easier to eat, but the flavor is very light and fresh.  On top of it all, the bread is crusty, and you get a little bit of the olive oil in there, too.  Layers of flavor = delicious.

The fresh ingredients really set this grilled cheese over the top, so if you're going to make it, try as best as you can to go for the good stuff!  We don't get to splurge often as undergrad gourmets, so treat yourself.  The good thing is that the mozzarella lasts for a long time (and I have another recipe with mozzarella coming soon!) so your dollar goes far.  As for the prosciutto... once you taste it, you'll see that it was worth every penny.

And, if you don't have a small grill/press, it's really easy to make it on the stove.  Just use a non-stick pan, lay the sandwich open on the pan, and put a small pot cover on it.  This will trap the heat and melt the cheese.  Then, put the two sides together and put the cover back on in order to press the sandwich down a little.  Be sure to flip carefully!

All in all, thank you, Sarah, for giving me this food challenge!  You gave me the inspiration to actually make my own sandwich for once... and I'm happy that it was successful!

---------------
Have you ever made a sandwich experiment?  Or, alternatively, what's your favorite grilled cheese sandwich?