Tuesday, March 30, 2010

Healthy(er) Broccoli Cheese Soup

From my senior year in high school to my winter break of sophomore year at Fordham, I worked at Panera Bread back in Connecticut.  And I loved it.  Seriously, if I hadn't needed to grow up and get a full-time office job, I would have kept working at Panera through last summer.  But now I'm at Travelers, and I love them too.

I have lots of love for my workplaces.

Sadly, my Panera days are no more, but that does NOT mean I have forgotten my Panera roots (my Sears roots, however?  Long gone.  Loooong gone).  I visit and eat there every time I go home, even though I want to jump behind the counter and make everything myself, because the food is actually good!  No, really... I'll bet that anyone who worked at McDonald's or something never wanted to eat that food again.  But even though all of the Panera food isn't as healthy as you think it is, it is fresh and it isn't so bad for you.

And what is the one thing that always, always, always reminds me of Panera?  Broccoli Cheddar Soup.  Do you know how healthy restaurant Broc-Ched soup is for you?  Not healthy at all.  Do I still eat it?  Yessirree!  However, when I'm making broccoli cheddar soup at home, I try not to fill it with bad stuff, for my own sanity.  I found this recipe, originally published in Cooking Light magazine, and it has worked out really well for me.  I do think that my version looks better than the one on the webpage... but you can decide that for yourself.

Enjoy my version of Healthy Panera Broccoli-Cheese Soup (and the pictures to go with it)!
(P-dub, I love you, I do.  But your soup is fattening.  And full of sodium.  I'm sorry.  I can't help it).


---------------
What you'll need:
  • 1 cup onion, chopped
  • 2 - 3 cloves garlic, minced
  • 2.5 - 3 cups low-sodium chicken broth
  • 16 - 20oz. package of broccoli florets (whatever you can find)
  • 2.5 cups 1% milk
  • 1/3 cup flour
  • 1/4 tsp black pepper
  • 8 oz. sharp cheddar cheese (you can do low-fat if you want... I didn't!)
  • Extra virgin olive oil
---------------
How to make it:

1.  Heat a little bit of olive oil over medium heat in a large pan.  Add in onions and garlic and sauté until soft (about three minutes).

This is about a cup of onion - one half of a medium-to-large onion


2.  Add in your broccoli florets (they shouldn't be completely frozen; if they are, just defrost them in the microwave for a little while).  Pour in broth at the same time.  Bring the mixture to a boil, turn down to medium heat, and simmer for 10 minutes.

 The broccoli is still a bit frozen, but I got it to break up.
That's what you want!
Covering the broccoli mixture makes it boil faster
...or that's my philosophy, at least

3.  In a separate bowl, whisk together flour and milk until there are no lumps.  Then, pour it into the broccoli mixture (still over medium heat) and stir until it thickens.
 Note that I transferred everything to a bigger pot.
I'm bad at planning ahead
As you're stirring, you can also mash up some of the broccoli if you have some pent-up anger.
I didn't have any pent-up anger- it just saved me a step later.
Plus, it was fun.


Another note: it's difficult to both cook and take pictures while your mother is also cooking dinner on the stove.
It's probably easier just to kick her out at this point.
(Just kidding, Mom)


Would you look at that?  Your broccoli is all mashed up already.  Good job!
If you chose not to mash, take about a third of the mix and put it into a blender.
Then, add it back into the pot.


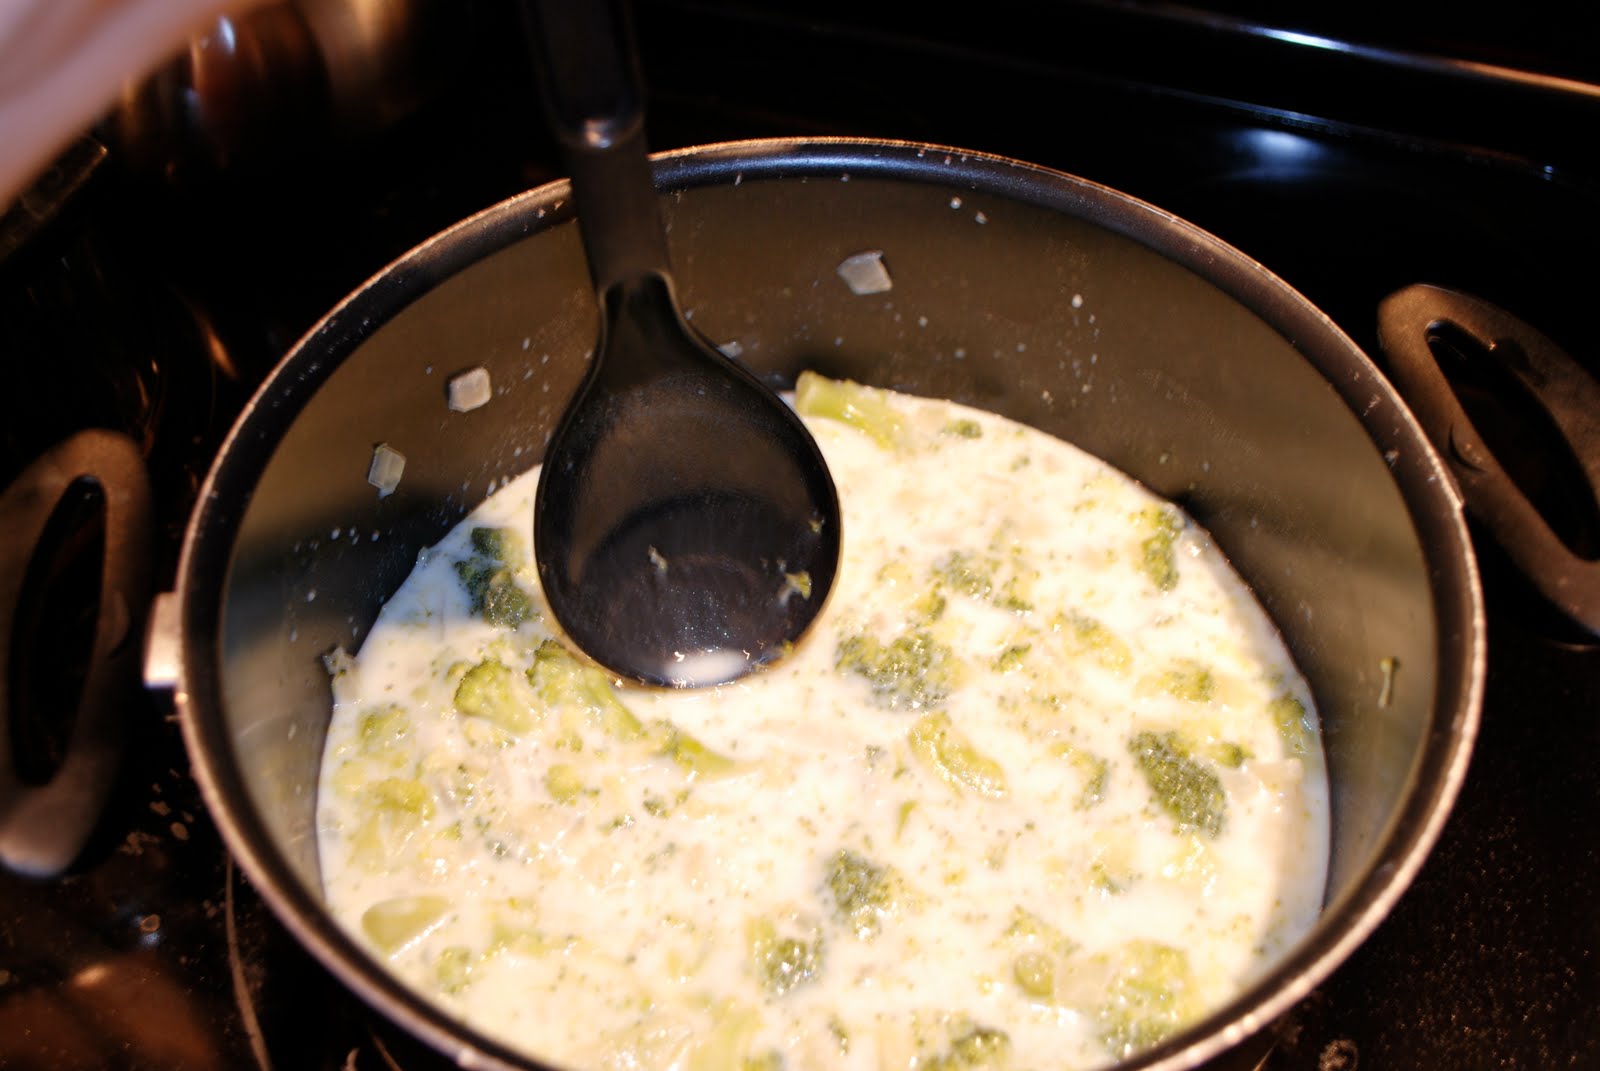
3.  What's missing from this very pale picture?  Ah, that's right: cheese.  Remove the pot from heat and stir in your cheese (a little extra never hurts, either).

 
Now, that's the stuff.


Look at this color!  That's looking more like broccoli-cheddar soup


4.  Oops!  Forgot the pepper.  Stir in 1/4 tsp (or a couple shakes) of black pepper (and maybe even a little salt too).

 
I hate black pepper, but I relented.  It's not so bad.


6.  Check for taste and make sure it's seasoned well!

 
Yeah, baby, that's some good soup.
Just take a little taste and make sure it's up to par...


...but make sure you don't drop your spoon in the pot of soup.
That's what I get for trying to take a one-handed photo.


That's a good lookin' spoonful of soup!
AND A DARN GOOD PICTURE, IF I DO SAY SO MYSELF!
Broccoli cheddar perfection
It goes great with a salad and some bread...


... or right into the Tupperware to freeze.
The things I do for my family.

---------------
If you freeze your soup, like I had to (I'm still getting over it), make sure that you reheat it on the stove, not in the microwave.  The microwave will just make it gloopy and weird.

---------------
Recipe review:

One thing I did not mention is that in high school, I made homemade broccoli cheddar soup for my then-boyfriend Nick.  And let me tell you, THAT SOUP WAS OUT OF THIS WORLD!  But it also had butter, Velveeta cheese, and lots of whole milk.  No good.

This recipe is so great because a lot of it is actually chicken stock, and you can use skim milk without it tasting bad!  The key is in cooking down the chicken stock so that it is concentrated enough to get the right consistency.  It's flavorful and much lower in calories, fat, and sodium.  I'm always a fan of more rather than less cheese, but as you can see from the color of the final product, this is plenty cheesy.

The final grade for this recipe is definitely an A.  But I'm not saying that you shouldn't still stop at Panera from time to time...!

---------------
For next time...
  • I wonder what other types of cheese would taste like!  I challenge one of you to tackle that
  • Different vegetables??  Maybe....?
  • Don't drop the spoon in the soup.  It will not behoove you.
---------------
Got any recipes that mimic your favorite restaurants' dishes?  Share them in the comments section!

Saturday, March 27, 2010

Foodie Series: Jamie Oliver's Food Revolution

From reading this blog, you have probably already realized that I love food and thinking I have a great deal of witty humor.  But one thing you should know about me is that I'm a huge TV junkie.  It's a bit sad, actually, but you'll forgive me, right?

So, I was really excited when Joe told me about a new series called Jamie Oliver's Food Revolution.  It has had two episodes so far, and both have been really great.  Basically, the premise is that British chef Jamie Oliver travels to the United States to begin a "food revolution" on the way that we eat.  He starts in Huntington, West Virgina, which was recently declared the unhealthiest city in America.  Over the course of a few months, Jamie aims to educate the residents of Huntington about healthy eating on many different levels... and he fights skepticism the whole way.

From what I've seen so far, Jamie is definitely lighting a fire under the residents of Huntington, and I'm interested to see where it goes as the series progresses.  But to start, I just want to talk about some of the background of the show get your initial take on it.

---------------
Who is Jamie Oliver?

Jamie Oliver is a British chef who is most well-known for his TV show The Naked Chef.  He believes in cooking with simple, natural ingredients, from which the show derives its name.  Jamie recently embarked on a campaign to change eating habits in the United Kingdom, including reforming school lunches and improving eating and cooking habits.  He often sparks controversy, and his work in Food Revolution is no exception.


Another fun fact about Jamie?  He has three daughters, and their names are Poppy, Petal, and Daisy.  Goodness gracious.

---------------
About Huntington, West Virginia

By this point, it is evident that we have an obesity problem in America.  But Huntington, West Virginia's population of nearly 50,000 has an obesity rate of almost 50%.  It also has high rates of diabetes, heart disease, and those who do not exercise.  In Huntington, it is more common to see 30-year-old's having heart attacks than 50-year-old's, and the local pastor constantly has to perform funerals for those who die of weight-related problems.  The statistics are shocking- on paper, and in person.

But the most shocking thing about Huntington is that many or most of its residents don't see a problem with their dietary system.  For them, it is normal- it is all they have ever known.  In fact, a CBS News article from November 2008 quotes the mayor as saying, "[The health issue] doesn't come up."  It is this attitude that Jamie enters a world of, and needless to say, it is not easy to combat.

---------------
Clip Preview from Episode 1

Here's a link to a short clip of what Jamie encounters when he first goes to Huntington for his food revolution:  http://www.youtube.com/watch?v=EcprJs7euRQ

---------------
Jamie Oliver's Food Revolution airs Friday nights at 9/8c on ABC.  Or anytime you want on Hulu!  Watch it and let's chat next week about it!

Wednesday, March 24, 2010

Spring Break Recap

Since you have all been vacationing and relaxing in the warm weather this week (if you're a Fordham student, that is), I assume reading Undergrad Gourmet hasn't been your top priority this week.  However, since I've been busy like a bee cooking and writing, so I don't want you to miss any of the delicious recipes from this week.

By the way, I got this idea from one of the other bloggers in my Online Media class, Sarah.  Her blog is here, The Gift Wrap Blog.  It's really fun and super cute, so check it out!

---------------
Monday, March 15:  Sunday Night Dinner: Penne alla Vodka with Chicken!
          Do you love pasta?  Tomatoes??  CHEESE???  Well, then, this is the recipe for you.

---------------
Tuesday, March 16:  Super Sides: Homemade Garlic Bread
          Forget about the store-bought stuff; once you make this garlic bread once, you'll make it forever.  Plus, it's super easy and fast!

---------------
          The title says it all; what else screams "undergrad" like Dorito Casserole?  Throw some chicken in there and you have a cheesy, enchilada-like casserole that will feed an army.


---------------
Friday, March 19:  Do you love The Pioneer Woman yet?  Well, then, I have good news!
          In another attempt to get you to love Ree, the Pioneer Woman, as much as I do, I shared some exciting news about another expansion of her blog!

---------------
Saturday, March 20:  Reasons I Love My Roommate: Chili Extravaganza
          Here's the recipe for a staple that everyone needs in their recipe box.  It's easy, fairly quick, and not too expensive.  In fact, I have some in my freezer waiting for me right now!

---------------
Sunday, March 21:  Chili Extravaganza: In Photos
          After a cooking marathon Saturday, this is a chili follow-up, all documented in photos!


You can definitely tell that I stayed home for my spring break; I had so much time to cook and blog!  Trust me, it's worth it to check out some of these recipes.  They're some of my favorites!

Coming this week: A broccoli cheddar recipe that I (sadly) never got to eat, the answer to a veggie debate, and maybe even some basic cooking skills... revisited. 

Sunday, March 21, 2010

Chili Extravaganza: In Photos

Although I originally made chili at the beginning of last week and forgot to take photos, you're all in luck!  Because I don't want my parents and brother to eat out every night between now and Easter break (which is only a week and a half), I made some food to freeze for them.  And one of those recipes was... chili!  Of course, since I was making food to freeze for my family, I just had to make a batch for myself as well.

That's how easy it is!  I can make two batches, no problem!

This time, I made a mental note to take pictures, and I even borrowed my brother's fancy camera to see what I could do.  Some of the pictures are dark, but I hope you can enjoy the chili goodness as much as I did!


Throw the ground turkey right into the pan and separate it with a spatula


Browned turkey!  Time to drain and throw into the pot


After rinsing out the pan, add in your chopped onions


If you have garlic monstrosities like I did, it's better to use two, rather than three


If you don't have one of these, go out and buy it right now!
It's a garlic crusher, and it will save your fingers lots of garlic-smelling agony


Add in your garlic until it's all soft
(It's in there, I swear)
Then add it into the pot with the turkey


Into the pot goes two cups of salsa (I chose medium spiciness)


Then add two cans of kidney beans
(Make sure you rinse and drain them, first!)


Now, this is the stuff you want for the tomatoes
"With Garlic and Olive Oil"
(Please ignore the 3-D photo)


That's what it'll look like when you add the whole can in, juice and all

And of course we couldn't forget this important ingredient...
Chili powder!
(2 tablespoons will give you a little kick without being too spicy)

      Cover it to simmer and resist the tempation to eat it now

And since this batch is for ME....

What are those little yellow kernels I see?...

 
YES... It's CORN!

What a beautiful sight.


And there you have it, folks.  If the previous entry didn't convince you to try this recipe out, these pictures should.  I'm even trying to improve on my photography skills to make it look more appetizing.  Until next time...

Wait... How did that sneak in there???
(He's quite adorable, don't you think?)


Happy spring, and keep cookin'!

Saturday, March 20, 2010

Reasons I Love My Roommate: Chili Extravaganza

One day during my sophomore year, my friends all wanted to get together for "family dinner" at my friend Taylor's house.  Back then, he was the only one with an apartment and, therefore, a kitchen, so it was quite a novelty for all of us.  Plus, if we cooked for him, he would let us hang out there instead of in our own rooms, so it was a pretty good deal.

Because we had such a big group of people, Andrea had a great idea: why not call her mom for their family's chili recipe?  While I was very happy to be eating a hearty, delicious meal, I was also a little nervous.  First of all, I am a huge wimp when it comes to spicy.  Andrea knows this and enjoys mocking me for it, so I knew she would not back down on the spice on my account.  Secondly, I had only had homemade chili a couple of times, at my hometown's Fire Dept. picnics (I know, right?  Ridiculous).  Isn't chili so typical for a fire department get-together?  I resist to overstate the irony.

However, putting my fears aside, I ate the chili and let me tell you, it was mondo deliciouso!  It was so good that I got the recipe from her and now cook it every single time I am home.  Even my family loves it!  I've tweaked it slightly over the past year, and I use ground turkey instead of beef because it's better for Joe to eat and lower in fat and calories.  Trust me, once you make this Classic Hearty Chili once, you'll make it a staple in your recipe book.  Plus, it's easy and fast!

---------------
What you'll need:
  • 1 lb. ground turkey (you can use beef if you want, too)
  • 1 medium to large onion, chopped
  • 2 to 3 cloves garlic, minced
  • 1 28-32 oz. can of diced tomatoes w/ garlic and olive oil (I use Red Pack brand- trust me, the garlic and olive oil kind is what you want)
  • 2 cans red kidney beans, drained and rinsed
  • 2 cups medium salsa
  • 2 tbsp chili powder
  • 10 oz. bag of frozen corn (optional)
  • Extra virgin olive oil
  • Salt, pepper, and garlic powder

---------------
How to make it:

1) Over medium-high heat, brown the ground turkey completely in a pan.  Drain and put in a large pot.

2) Wash your pan and use it again to heat olive oil over medium heat.  Add onion and garlic to the pan and cook until the onions are soft and translucent (about 5-6 minutes).  Add these to the pot as well

3) Add tomatoes, beans (washed and drained), and salsa to the pot.  Stir all ingredients together and turn the heat on to medium-high.  Add in the chili powder and stir well.

4) Bring chili to a boil.  When boiling, turn down to a simmer (medium-low heat) and cover.  Cook for 20-25 minutes.  When cooked, add salt, pepper, and garlic powder to taste.  If you're brave, you can also add more chili powder- but not if you're a wimp like me!

5) If choosing to use corn, stir the frozen corn in and cover for five more minutes.  Although I love corn, Jonathan hates it, so we don't use it when I make it at home.

6) Serve with sour cream and cheese and enjoy!

---------------
This recipe is a staple in my many kitchens, so there's no need for a review.  The garlic and olive oil tomatoes just adds an extra something that makes the chili absolutely perfect, so I highly recommend finding it!  I also recommend that you use corn in the chili and then convince my little brother to stop being a teenager and realize just how GOOD it makes it.

Also, if you hadn't noticed, this recipe is GF/DF friendly!  Hallelujah!  It's one of Joe's favorites too, but he makes it much more spicy than I do.  To each his own, I suppose.

Thank you, Andrea, for this delicious chili, and I'm sorry I ever doubted you!


Are you a spice nut or a spice wimp like me?  What's the best chili you've ever had?

Friday, March 19, 2010

Do you love The Pioneer Woman yet? Well, then, I have good news!

As I was surfing around some blogs today, I came upon an article that said something too good to be true!  At this point, everyone should be aware that I have a sick obsession with The Pioneer Woman cooking blog by Ree Drummond.  As much as I love thinking about living in an apartment in the city, living the hip life and running around to upscale events every night, part of me wants to do the complete opposite and take after Ree!

You see, Ree was once a twenty-something city girl, much like I am (except she was in the other "city" - L.A.) just trying to make her way up in the posh lifestyle to make the big bucks someday.  She claims that she wore black heels to work everyday and ate way too expensive food with business execs.  I'm not sure if that's where I'm headed right now... but it's quite possible.

Well, on her way from L.A. to Chicago to start a great new life, Ree stopped over in her home state of Oklahoma for a visit.  And there she met... Marlboro Man.  It was love at first sight and next thing she knew, Ree was married to a rancher, herding four children and writing an incredibly successful website for people like me to read every day.

Does it sound like a movie to you?  It certainly does to me, and my friends say that my life resembles a movie sometimes.  But that's a story for another time.

Well, guess what?  It IS going to be a movie!!!  According to an article on Deadline New York, Columbia Pictures just picked up the rights to Ree's story and will reportedly produce a movie based on it in the near future.  A book detailing the story, written by Ree, is also scheduled to be released next Valentine's Day.  Now, what's a better gift for your sweetie than that?

If you're itching to hear the whole story in the meantime, read Black Heels to Tractor Wheels on Ree's website.  It's written in blog entry format, so it should also be an interesting read for all of you bloggers out there.  Happy reading, and if you want to join in on a midnight release party for the movie (about two or three years from now), you know where to find me!

Thursday, March 18, 2010

The Ultimate College Meal: Dorito Casserole

If any recipe that I've found epitomizes the typical college student diet, it's this one.  Yes, this is indeed... Dorito Chicken Casserole.  When you first hear the name of the dish, you may think it's bound to be absolutely disgusting, but trust me, it is delicious.  But be forewarned - this is definitely a guilty pleasure and should be enjoyed in moderation!  Even ask my friend Taylor, the king of non-moderation; the first time we had this, he ate half of the pan and felt very sorry afterward.

Since you're probably wondering what exactly Dorito Chicken Casserole would taste like, I will relent just this once and give you a sneak preview.  Honestly, it doesn't taste anything like Doritos!  I don't even like Doritos (which I realize is very strange, but I accept it).  The website where Joe's mom found this recipe actually calls it "Enchilada Casserole," which is really fitting for what the final product is.  It's Mexican, it's cheesy, it's delicious!

Note: I did make a couple of changes from the original recipe, as always.  Most notably, I added chicken!

---------------
What you'll need:
  •  One 13 oz. bag of original-flavor Doritos
  • 2 tbsp finely chopped onions
  • One 8 oz can of tomato sauce
  • One can of chili w/ beans
  • One 10-15oz. can of enchilada sauce (the red sauce, not the green!)
  • 1.5 cups shredded cheddar cheese
  • 1.25 cups sour cream
  • 1 to 1.25 lbs boneless, skinless chicken, cut into 1-inch pieces
---------------
How to make it: 

1)  Preheat oven to 375 degrees and grease a casserole pan (preferably 8.5x11 inches)

2)  Crush Doritos in bag until they are in small pieces.  Set aside 1.5 cups of the Doritos for the topping and pour the rest into a mixing bowl.

3)  In a pan with olive oil over medium-high heat, brown the chicken until it is no longer translucent.  Drain from the oil and set aside.

4)  Combine onions, enchilada sauce, tomato sauce, chili, 1.25 cups of cheese (not all of the cheese!), and chicken with the Doritos.  Mix together gently with a spatula and pour into casserole dish.

5)  Bake for 20 minutes.

6)  Take casserole out of the oven and spread sour cream evenly over the top of the casserole.  Sprinkle 1/4 cup of cheese over the top of the sour cream, and then sprinkle the rest of the Doritos!

7)  Bake for 5 more minutes

You should now have something that looks a lot like this:

This picture was taken after my hungry family descended upon it (myself included)
I promise that your Dorito Casserole will not be half eaten when it comes out of the oven.

Enjoy!
 
---------------
Recipe review:

This recipe is perfect if all of your friends are coming over for dinner one night.  I guarantee that everyone will be very skeptical at first, but once they take a bite, they will fall in love.  It may even get them to do the dishes for you afterward!

I also love that this recipe is extremely flavorful but super easy.  It gives you that "enchilada" tasta without all of the steps that enchiladas require.  When I made it today, I threw everything together yesterday when I had time, refrigerated it, and popped it in the oven about a half hour before my parents got home from work!

However, this is definitely not an everyday recipe, simply because it is filled with unhealthy calories.  Save it for those "comfort food" nights when you have everyone over and need to feed a lot of people fast.  That way, you won't have a half-pan of leftovers tempting you for the rest of the week.  I'm not saying that leftovers aren't great (we all know that I love them), but it's better to go for a little than a lot.

Grade: A- (the minus is for the unhealthiness, but the taste gets top marks!)

---------------
For next time...
  • Perhaps use another kind of meat?  The recipe doesn't have chicken to begin with, which means you can use whatever you have handy!
  • Vegetables!  There are none!  I'll bet that throwing in some corn (even if it's frozen!) or something else would be delish.
What did you think when you first heard "dorito casserole"?  Do you have any favorite junk food recipes that you love?

---------------
Coming up this week...

I'm sorry to say that tomorrow will be a no-cook day, as it is time for the Friday night Lent fish fry at the Knights of Columbus in town!  I do love the quirks of small-town America sometimes, and I miss them every once in awhile in the big city.  However, I may not be totally absent... I have a couple of blogs and topics up my sleeve!

But Saturday... get ready for a marathon cooking day!  Although dinner is an overdue corned beef and cabbage night, I'm stocking up my family (and myself) with a couple of dishes to freeze and reheat after I leave on Sunday.  Last time I only made food for myself, and they complained, so I'm trying to make up for it now.

Keep cooking!

Tuesday, March 16, 2010

Super Sides: Homemade Garlic Bread

I'll admit it: I cheated by splitting up Sunday night dinner into two posts.  Yes, I made this Homemade Garlic Bread to go with the Penne alla Vodka with Chicken that I posted yesterday, but I had it last night and Friday night as well, so it counts as a separate recipe, right?  It also goes to show how good it is... I would eat it any day of the week!

This recipe gets credited to my lovely friend Jen, who just returned from two months in Paris and generously made us garlic bread at a get-together Friday night.  I always thought of garlic bread as more Italian than French, but they are very close so I guess it doesn't matter.  She probably doesn't even realize that I was paying attention to her making this bread (and mine might be a little different because honestly, I wasn't paying attention that much), but I thank her duly and promise here and now to repay her with food in the near future.

Come back to Fordham, Jen.  Come back.

This is an instance in which the measurements listed below are just guesstimates; I just threw a bunch of stuff together, bada-bing, and popped it in the oven.  Therefore, I give you permission (as always) to experiment with other/different amounts of ingredients, as long as you report back to me afterwards.

---------------
What you'll need:
  • 1 loaf of fresh Italian (or French) bread
  • 1/4 to 1/2 cup extra virgin olive oil
  • 2 to 3 cloves garlic, very finely minced or crushed
  • 2ish tbsp parmesean cheese (the kind from the jar or bottle)
---------------
How to make it:


1) Preheat oven to 350 degrees.  Cut the loaf of bread in half and place soft-side up on a baking sheet.

2) In a small bowl, combine olive oil, garlic, and cheese.  Mix with a fork well.  If it seems too oily, add a little more cheese- but careful!  You don't want it to be solid.

3) Microwave for 15-20 seconds (don't let it explode!)

4) Spread the mixture evenly onto both halves of bread.  I had to make a little extra the first time because I just really love garlic spread on my bread.

5) Bake for 8-10 minutes, or until the edges begin to crisp.  Cut into slices and enjoy!

---------------
Recipe review:

Judging from the amount of times I have served this garlic bread with main courses over the past three days, I think it's fair to say that this is a delish anytime recipe.  It goes with pasta, rice, soup, anything!  I also love it because it doesn't have butter in it, which makes me think it is a lot healthier.  It probably isn't.

Verdict...A plus!

Thank you, Jen, for this wonderful recipe that I am now taking from you to put on my blog.  This is the real reason why I was so happy that Jen was coming home.  Just don't tell her that.
(I'm just kidding, Jen.  But anytime you want to come use my kitchen, you are welcome to.  Very welcome.)


What would you serve this garlic bread with?  Any ideas for more things to add into the spread?

Monday, March 15, 2010

Sunday Night Dinner: Penne alla Vodka with Chicken!

Now that I am home for spring break, I have much more time to cook and spend time with family.  Naturally, my father suggested incorporating the two because he loves it when I make a home-cooked meal for everyone!  So, I invited my grandparents over (they live across town) and we all had dinner together.

What did this special occasion call for?  A hearty, delicious meal, of course.  Which means... pasta!!  Pasta is such a great thing to make when you have to cook for a large group of people because it goes a long way and, when made in bulk, is usually pretty cheap.  Since this was our first get-together in two months, though, I decided to go all out with a homemade pasta sauce.  The Pioneer Woman (my go-to gal when I need a great recipe!) gave me this pasta alla vodka recipe, to which I added chicken and made Penne Alla Vodka with Chicken!  There were a few bumps along the road, which are duly noted in the step-by-step.

If you have a special occasion coming up and want something super yummy, try out this recipe...

Note: I made a double batch of this because we had a lot of hungry people, but I'll post the recipe for a regular batch.

---------------
What you'll need:
  • 1 lb. penne (or your favorite pasta) 
  • 1 med. onion, chopped
  • 3 cloves garlic, minced
  • 3/4 cup vodka
  • 1 can tomato puree (28 oz)
  • 3/4 to 1 lb. chicken, cut into 1-inch pieces
  • 1 cup half-and-half
  • 1/2 tsp salt
  • Extra virgin olive oil
  • Black pepper
  • 1 to 1.5 cups grated parmesean cheese
---------------
How to make it:

1) Heat some olive oil over medium heat in a large saucepan or pot.  Add onion and garlic; cook for about two minutes, stirring occasionally.


2) Pour in the vodka and be careful not to let the steam clear out your nose, like it did to me.  This is very important: cook for about three minutes but make sure that the vodka is cooked out of the onions and garlic well.  I did not cook the alcohol out enough, and I think it made my dish more bitter.

3) Add in tomato puree, stir, and reduce heat to low.

4) Start cooking your penne now, according to package directions.  When it is done, drain well; you'll be adding it to the sauce.

5) In another pan, heat olive oil on medium-high heat.  Season chicken with salt and pepper and saute until cooked through.  When it is done, drain the juice and set chicken aside.

6) Now it's time to add the cream to the sauce!  While stirring, add 1 cup half-and-half to the sauce mixture so that it turns a light pink/orange color.  Also very important: add in enough salt to balance out the tomatoes and vodka.  My sauce suffered from lack of salt - don't let it happen to you!

7) Add the drained pasta and chicken into the sauce and stir to combine. Stir in parmesean cheese (the more, the better, in my opinion!)

8) You're all set to serve.  Ree suggests that if your pasta is a little too thick, add a little pasta water in to thin it out.  It would have been helpful for me to tell you this when you drained the pasta, huh?

---------------
Recipe review:

As I mentioned earlier, I had a few setbacks with my penne alla vodka.  I don't think that the vodka cooked out right, and I had to add in some extra half-and-half because it was a little bitter.  Then, I didn't add enough salt.  So, I suggest that you learn from my mistakes and take these precautions!  I will say that I have found out that when this pasta sauce is lacking, just add more cheese.  I added tons and tons and tons of cheese.

(I am guilty of cheese gluttony.  But you'll never figure out where my hometown is to charge me on that.)

Also, I will note that Ree's recipe caused for the use of butter instead of olive oil and heavy cream instead of half-and-half.  I chickened out and used two healthier-but-still-bad-for-you substitutes.  It's up to you!

Overall, I'll bet the recipe was an A-plus recipe, but as a first time maker of vodka sauce, I had a couple of slip-ups.  My version?  Maybe a C-plus.  I'll keep working on it.

---------------
For next time...

Well, you already heard my ut-oh's, so I won't state them again here.  I also apologize for no photos this time; I got a little behind in schedule and completely forgot!  I am making one very special recipe later this week that I know you all will love, and I swear to you all that I will have pictures to accompany the recipe.


What's your favorite family dinner?  And more importantly... where did you go this spring break??

Saturday, March 13, 2010

Back to Basics: Chicken with Caramelized Onions

When you just don't feel like making a fuss about dinner, don't have a lot in your kitchen, but don't want something from a box, it's really easy to make some basic pan-fried chicken.  But pan-fried chicken on its own is boring!  So, add some onions to it.  Raw onions, of course.  If you close your eyes and bite into one like an apple, it will taste great.  Trust me.

Just kidding.  Don't do that.  Unless you're into the book/movie Holes or something.

We are going to caramelize our onions today, folks, and you will thank yourself for doing so.  I guarantee that when you are out of ideas for dinner from now on, you will just caramelize some onions and be good to go.  That's my philosophy of cooking, at least.

Now, if you don't have onions in your pantry at all times, close your computer, buy a bag, and then come back and keep reading.  The same goes for potatoes, by the way.  Always have a bag of onions and a bag of potatoes on hand!

Since you just exhausted yourself running to get some onions at the grocery store, it's a good thing that the Chicken with Caramelized Onions recipe is super simple.  Let's get cooking, shall we?

---------------
What you'll need:
  • One or two boneless, skinless chicken breasts (depending on if you want one or two)
  • One medium to large onion
  • 1-2 cloves garlic, minced
  • Extra virgin olive oil
  • Salt, pepper, and yum-o other seasonings (like garlic and onion powder! And seasoned salt!)
---------------
How to make it:

This recipe can be a one-panner or two-panner.  We'll treat it like a two-panner, for now.

1.  Season the chicken on both sides with seasoned salt, pepper, garlic powder, and onion powder.  Don't drown the chicken, but you want to have some flavor.  Paprika is good too!

2.  Heat olive oil in a pan over medium-high heat and place chicken in pan.  After 5-6 minutes, turn over the chicken.  You want the meat to be almost fully cooked, but you will add it back in later, so make sure it won't be dried out.  Remove to plate and cover with aluminum foil.

3.  Slice up the onion into long strips.  You don't want them too big, but it's nice to have some larger pieces that you can grab with your fork.

4.  Heat olive oil in pan #2 over medium-low heat.  Cook the minced garlic for about 30 seconds and then add in the onions.  The trick here is to have enough oil that the onions won't start to burn.  You also want to keep the heat on the lower side to also avoid burning.

5.  Continue to stir the onions periodically as they cook.  In order to really caramelize the onions, you have to let them cook for awhile.  When they turn brown (good brown, not burnt brown), add a little salt to taste.

6.  At the very end, add the chicken into the pan and cover for about 3-5 minutes.  This will finish cooking the chicken and meld all of the flavors together.  When the chicken is cooked, it's ready!

---------------
Recipe Review:

This recipe, as I said, is really easy and simple when you just want to throw something together.  Plus, once you caramelize onions the first time, you'll want to add them to everything.  Burgers?  Steak?  Rice?  Pasta?  All good candidates for caramelized onions, baby.


When you're short on time and energy, what do you throw together for dinner?

Coming soon: Many unhealthy, delicious, wonderful, time-consuming spring break meals... complete with pictures!

Tuesday, March 9, 2010

What to do with all that sausage...

So what can you use that Trader Joe's Chicken Sausage that you just ran out and bought after reading yesterday's post?  Oh, funny you should ask.  How about one of my favorite recipes: Sausage and Sun-dried Tomato Pasta.  It's from Gordon Ramsay's Fast Food cookbook, but since I don't have the cookbook in front of me, I don't have the exact recipe.

By the way, you can also use regular sausage or turkey sausage with this recipe.  I'll bet any kind of regular or spicy variety would taste great.  Also, when you buy your sun-dried tomatoes, get them in oil; you can use the yummy oil in the pasta.

---------------
What you'll need:
  • 5 or 6 links of sausage (turkey, chicken, or pork) 
  • 1 lb box of rotini pasta
  • 1 small to medium sized jar of sun-dried tomatoes in oil
  • 1-2 cloves of garlic, minced
  • Pitted olives (optional)
  • Extra virgin olive oil
---------------
How to make it:

1)  First, bring a pot of water to boil.  If the sausage is uncooked, boil it for 5-6 minutes.  This will get some of the fat out and help the sausage stay together when you cut it.  Once you drain the sausage, you can rinse out the pot and bring another pot of water to boil for the pasta.

2)  Slice the sausage into bite-sized pieces (careful: it's hot!).  You might want to take the casing off, too, because sometimes it can fall off and just be a nuisance in your pasta.

3)  Take the tomatoes out of the oil, but don't throw away the oil!  Cut the big tomatoes into bite-sized pieces as well so they will go further in the pasta.  The amount here is up to you; I love sun-dried tomatoes, so I use more rather than less.  If you're using olives, you can cut them up too.  (I hate olives- hate, hate, hate them.  Yuck!)

4)   If you haven't gotten that pasta in to boil yet, do it now.  Yep, the whole box.  We're going for leftovers, here.

5)  Meanwhile, heat some olive oil in a pan on medium heat.  Cook the minced garlic for about 30 seconds, and then throw the sausage in there and cook until it starts to brown.

6)  Once the sausage is almost ready, add in the sun-dried tomatoes and optional olives.  Cook for a couple more minutes, until the tomatoes and olives start getting hot and wilty.  I apologize for that odd description.

7)  When the pasta is ready, drain it well and add it to the pan.  I hope you used a big pan so that you don't have any overflow when you stir.  Incorporate all of the ingredients together, drizzling enough olive oil (this is where you can use the sun-dried tomato juice!) to lightly cover the pasta.

8)  Voila!  Serve and enjoy.  And if you want, add some balsamic vinegar... you'll thank yourself later.

Monday, March 8, 2010

Product Feature: TJ's Chicken Sausage

I first must start off with a big APOLOGY to everyone for my absence recently.  Because I was performing in a production this weekend, I had no time… which means no cooking OR writing!  Therefore, I have been very lonely and hungry this week without my blog.  However, I am back, and next week is spring break, so be prepared to have more updates than usual.  Mom and Dad are big fans of having their own chef during breaks.

Today’s post features a product from one of my new favorite stores: Trader Joe’s.  I’ve never seen a Trader Joe’s near me in Connecticut (the closest is over a half hour away), but when Joe and I were on Long Island a few weekends ago we made a trip.  Trader Joe’s has products with great quality for a low price, which is really all that you could ask for!  If there was a TJ’s near my house, I would go there ALL the time, and if you haven’t been, you should check it out too.

We discovered a product that is going to make me go back to TJ’s again and again just to try all of the flavors: Trader Joe’s Chicken Sausage!  And this chicken sausage was not just plain ol’ “boring” sausage; it came in many, many different flavors.  Here are some of them:
  • Sun-dried Tomato
  • Spicy Italian
  • Sweet Apple
  • Sweet Apple and Champagne
  • Spinach and Feta
  • Others that I can’t remember!

Now, what are the benefits of chicken sausage over regular sausage?  Personally, I like the taste better because it doesn’t have as much of a “bite” as regular sausage (but that is my personal preference).  But chicken sausage is much healthier and lower in fat than regular sausage, and this TJ’s chicken sausage is gluten free and mostly dairy free, depending on the flavor.  Also, it is pre-cooked, so no need to boil it before sautéing it in the pan.

As for the flavors, Joe got Spicy Italian and I got Sweet Apple.  It was a terribly difficult decision.  Joe’s review of the Spicy Italian was slightly lackluster; he said that it was definitely good, but it wasn't spicy enough.  Ultimately, it didn't meet our high expectations.  However, we both tried the Sweet Apple and it was DELICIOUS!  It had actual apple chunks in the sausage, which made it really sweet and something that was very unique.

All in all, I will definitely be back to TJ's soon in order to get, among other things, more TJ's Chicken Sausage.  I'll let everyone else decide... what is your vote for the next flavor I should get?  I'm debating between sun-dried tomato and spinach/feta; something savory this time!